In recent years, the portability and cost-effectiveness of Desktop Audio Production have allowed musicians to have recording setups at home. However, there are some things you’d want to know before setting up the best home recording studio possible.
A basic setup will consist of; a computer with a software application for recording, an external hard drive, audio interface, keyboard controller, speakers (or headphones), and at least one microphone.

Before we talk about the equipment, let’s start by reviewing the common types of audio and computer connections that you should be familiar with:
Audio Connectors
1) 1/4″ TS – used for instruments such as guitar, bass, and keyboards.
2) 1/4″ TRS – used for connecting headphones to your audio interface output for monitoring.
3) RCA – used for consumer audio components such as home stereo systems
4) XLR – used for connecting microphones to your audio interface or mixer.
5) A “Combi” connector can accept either an XLR connector for mics or a 1/4″ connector for line-level instruments such as guitars and keyboards. Commonly used for inputs on smaller audio interfaces.
For more info and pics of the various audio connectors, checkout;
The Ultimate Guide to Audio Connector & Cables
Computer & Software
Whether you are using a Mac or a PC, the computer will serve as your recording device and the heart of the entire system. You’ll need to use a software application for recording, editing, and mixing. We refer to this type of application as a Digital Audio Workstation or “DAW” for short.
Audacity is a free application that offers all the features needed to record, edit and mix audio. It also includes signal processors such as EQ, compression, and reverb.
Many other applications offer additional features such as MIDI sequencing that you can use once you’ve gotten familiar with the basic techniques. DAW Software Buying Guide
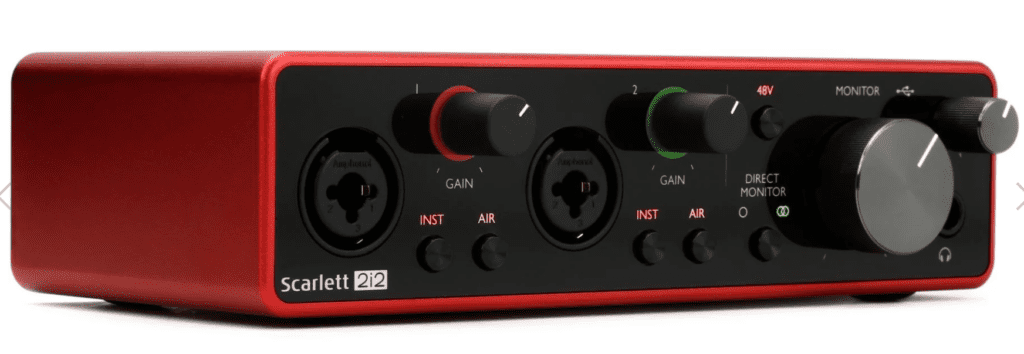
Audio Interface
There are two main things that an audio interface does; 1) Audio Conversion 2) Level Control
An audio interface converts the incoming analog signals from a microphone or line-level instrument to binary code (1’s and 0’s). It sends that information to your computer through a USB cable connected to your computer. When you playback the digital audio, the same process happens in reverse. The computer sends the digital information to the audio interface and converts it back to electrical energy you hear with headphones or through the main outputs sent to powered monitors. Many interfaces have built-in preamps that allow for independent gain control of each channel used for recording. They also have independent control of headphone level, and the output sent to the monitors.
There are multiple reasons why an audio interface is needed;
– The built-in audio input/output of your computer does not adequately handle the levels needed for recording.
– It is not able to record multiple inputs at once.
– The ⅛” jacks are not compatible with standard microphone connections
– And the computer input is not able to supply the 48v phantom power needed for condenser mics.
System Requirements
Before purchasing a device, you will want to check the system requirements listed for the product to make sure it is compatible with your computer. It is essential for older model computers that may not possess the minimal requirements to work properly with the device.
You will want to know the current operating system, processing speed, and amount of RAM of your computer. RAM is the amount of “Active” memory that your computer has available to run the applications used.
You can find this information on a Mac by going to the “Apple Menu” in the top left corner of the screen and selecting “About this Mac.” It will bring up the Overview window, revealing the current OS, processing speed, and available RAM. Clicking on “System Report” will give additional information about the computer in greater detail. (Apple Menu > About > System Report)
You can find the computer info on a PC by clicking the “Windows Start Button” in the bottom left corner and selecting the “Settings” icon. Then select “System,” scroll down the left column to the bottom and click “About.” Here, you will see the current Operating System, Processor speed, and amount of RAM the computer has.
Connecting the Audio Interface
You can connect most current audio interfaces via USB and without an additional power source. You should plug the interface directly into the computer. Plugging the interface into a USB hub attached to the computer can cause issues with supplying the proper power required from the USB bus to the interface. Interfaces that require external power will come with an AC cable.
Microphones and instrument cables plug into the inputs on the front. You can monitor outputs through headphones plugged into the 1/4″ stereo output or separate left and right line outputs that feed a pair of powered monitors.
Some interfaces require a software download to allow for functionality with the computer. Check the user manual or website to see if a download is required. Make sure to restart your computer after any software updates are complete.
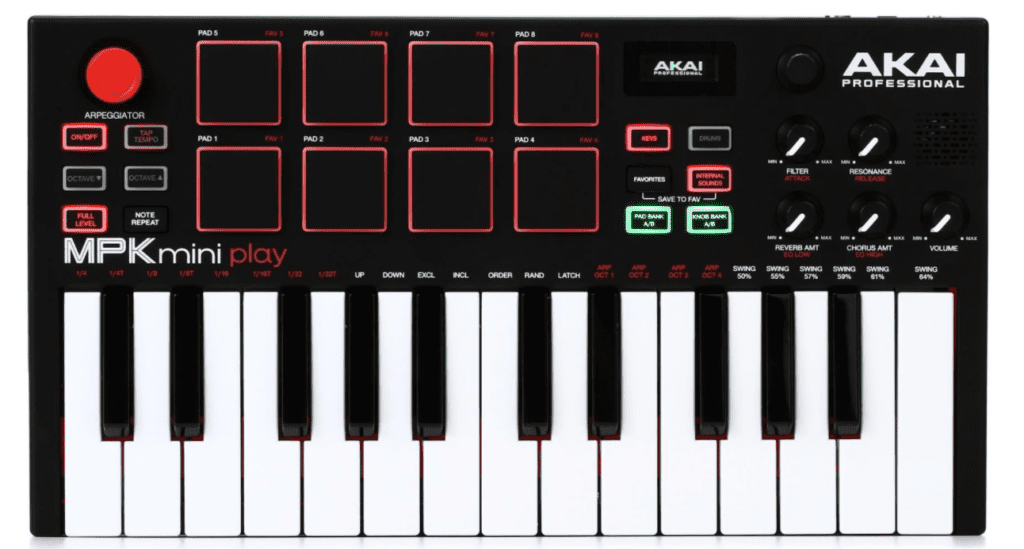
Keyboard Controller
If you are programming drums and other MIDI instruments, you will want some kind of keyboard controller to trigger notes using the sounds in the DAW. The controller plugs directly into a USB port on your computer. There are many types of controllers. Here is a list of current top-rated models: 10 Best Midi Keyboard Controllers in 2021
Microphones
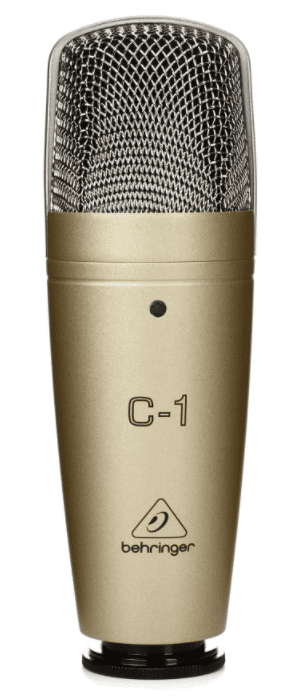
Dynamic mics are frequently used for vocals in a live setting, but the best mics to use in the studio for acoustic instruments are condenser mics. They have better sensitivity but require “phantom power,” a 48v power source supplied through the mic cable by the interface or mixer. There are many affordable mics to choose from, like the Behringer C-1 large-diaphragm condenser mic or a pair of Behringer C-2 Matched pair small diaphragm microphones.
Some microphones have switches that change how the microphone picks up the sound. The Behringer C-3 Dual-diaphragm Condenser Microphone has switches to attenuate the input signal by -10dB, low-cut, and select between three different polar patterns to change the directional sensitivity of the mic. I typically use large-diaphragm mics for vocals and the smaller diaphragm mics for acoustic instruments and as overhead mics on a drum kit.
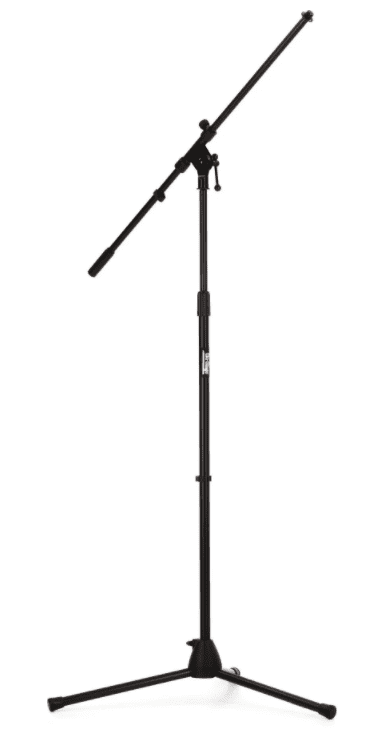
You’ll also need a few XLR cables to plug the microphones into your audio interface. They come in a variety of sizes depending on your needs. You will also need microphone stands to position the mics around the sound source.
Monitoring with Speakers
Speakers in studios are referred to as “Monitors” and come in two types – active and passive. Most home stereo systems use passive speakers. In these systems, the amplifier is in the stereo receiver itself, sending the powered signal to a wooden box equipped with speaker drivers to emit the sound.
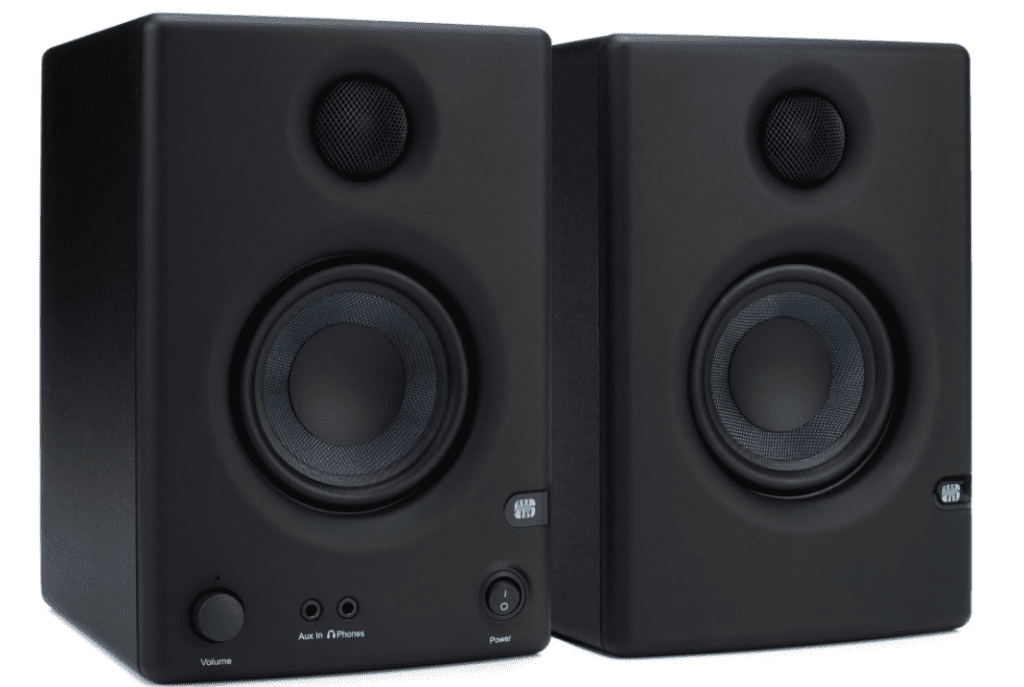
The best speakers for home studio use are active monitors. These units have the amp system built into the box and are matched for proper output gain and frequency response. “Near-field” monitors are meant to be listened to from about 3 feet away. They are usually compact and are easy to connect – a single active speaker needs only a power cable and an input cable from the mixer or audio interface. They tend to be more precise and accurate as compared to the passive speakers.
There are many options for near-field monitors. Some of the more affordable models to consider are the PreSonus Eris E3.5 and the M-Audio AV32. These models only require AC power to the left monitor, which contains a two-channel power amp. The main outs from the interface are fed to the inputs of the left monitor, which feeds powered signal to the right monitor using traditional speaker wire via the +/- terminal connections.
Monitoring with Headphones
Although monitors are helpful, they are not always necessary since you have monitoring capabilities from the interface’s headphone jack. Even if you have speakers, you will need to use headphones while recording since you don’t want the microphones picking up the sound coming from the speakers.
There are two different types of headphones that I currently use: the Sennheiser HD280 closed-back headphones are good during recording since they are tight to the ear. They don’t let the sound bleed into the microphones while recording.
When I’m editing and mixing with headphones on the laptop, I prefer the AKG K240 semi-open back headphones. They aren’t as tight to the ears and are more comfortable when worn for long periods.
Hard Drives
The hard drive is an essential piece of hardware responsible for storing all the files in your computer and capturing what is recorded in real-time. The internal hard drive in your computer is always busy reading and writing information while it is used.
Although the internal drive can handle basic recording tasks, you should use an external drive to record and store project files. Using an external drive takes some of the burden off your computer with real-time tasks and keeps things working smoothly.
There are two basic uses to consider when purchasing a hard drive; storage backup and active use.
There is a difference between a drive used for backups and one for audio and video projects. The main difference is the speed at which the drive can spin.
For recording, you will want a drive that runs at 7200 rpm or a solid-state drive.
Drives that spin at 5400 rpm or slower are not suitable for audio recording but can be used for backup storage or archiving projects.
Consider this article that profiles some of the best External Hard drives in your search for more storage as well.
PRODUCT RESOURCES
Microphones
Behringer C-1 Large-diaphragm Condenser Microphone ($60)
https://www.sweetwater.com/store/detail/C1m–behringer-c-1-large-diaphragm-condenser-microphone
Behringer C-2 Matched Studio Condenser Microphones ($70/pair)
https://www.sweetwater.com/store/detail/C2m–behringer-c-2-matched-studio-condenser-microphones-pair
Behringer C-3 Dual-diaphragm Condenser Microphone ($78)
https://www.sweetwater.com/store/detail/C3m–behringer-c-3-dual-diaphragm-condenser-microphone
Audio-Technica AT2020 Cardioid Condenser Microphone ($99)
https://www.sweetwater.com/store/detail/AT2020–audio-technica-at2020-cardioid-condenser-microphone
AKG P420 Large-Diaphragm Condenser Microphone ($149)
https://www.sweetwater.com/store/detail/P420–akg-p420-large-diaphragm-condenser-microphone
Rode M5 Matched Pair Compact Condenser Microphones ($199)
https://www.sweetwater.com/store/detail/M5MP–rode-m5-matched-pair-compact-condenser-microphones
Shure SM81 Small-diaphragm Condenser Microphone
https://www.sweetwater.com/store/detail/SM81–shure-sm81-small-diaphragm-condenser-microphone
Audio-Technica AT4050 Condenser Microphone ($700)
Microphone Stands
https://www.sweetwater.com/c396–Microphone_Stands
Microphone Cables
https://www.sweetwater.com/c1033–Microphone_Cables
Headphones
Sennheiser HD 280 Pro Closed-back Headphones ($100)
AKG K240 Studio Semi-open Pro Studio Headphones ($70)
https://www.sweetwater.com/store/detail/K240S–akg-k240-studio-semi-open-pro-studio-headphones
Powered Monitors
PreSonus Eris E3.5 3.5″ Powered Studio Monitors ($100/pair)
https://www.sweetwater.com/store/detail/ErisE3.5–presonus-eris-e3.5-3.5-inch-powered-studio-monitors
M-Audio AV32 3″ Powered Studio Monitors ($100/pair)
https://www.sweetwater.com/store/detail/AV32–m-audio-av32-3-inch-powered-studio-monitors
Yamaha HS5 5″ Powered Studio Monitor ($199 each)
https://www.sweetwater.com/store/detail/HS5–yamaha-hs5-5-inch-powered-studio-monitor
Yamaha HS7 6.5″ Powered Studio Monitor ($320 each)
https://www.sweetwater.com/store/detail/HS7–yamaha-hs7-6.5-inch-powered-studio-monitor-black
Audio Interfaces
Focusrite Scarlett 2i2 3rd Gen USB Audio Interface ($160)
PreSonus AudioBox iTwo USB Audio Interface ($160)
https://www.sweetwater.com/store/detail/AudioBoxiTwo–presonus-audiobox-itwo-usb-audio-interface
Steinberg UR22mkII USB Audio Interface ($165)
https://www.sweetwater.com/store/detail/UR22MKII–steinberg-ur22mkii-usb-audio-interface
Solid State Logic SSL2 USB Audio Interface ($230)
https://www.sweetwater.com/store/detail/SSL2–solid-state-logic-ssl2-usb-audio-interface
Hard Drives
Storage – Backup: Seagate Expansion 2TB USB 3.0 External Hard Drive ($56)
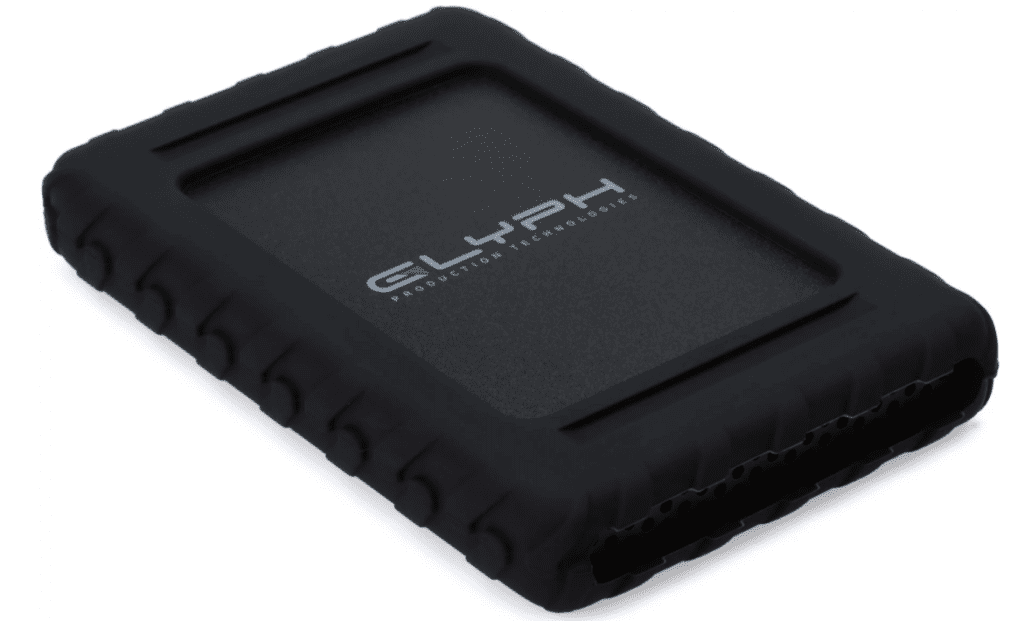
Great for Recording; Glyph Blackbox Plus 1TB Rugged Portable Solid-State Drive ($200)
Great for recording. USB powered (does not required AC power source)
by Steven Lipman
Will you get accepted at a top music college, conservatory, or university music program? It can depend on a lot of factors, including the school’s acceptance rate.
Factors Influencing Acceptance Rates
An institution’s acceptance rate reflects the percentage of students who get accepted into it out of all who apply. When an acceptance rate is higher, a school is easier to get into. Conversely, when a school’s rate is low, it’s harder to gain admittance.
Many factors can drive down an institution’s acceptance rate, and the circumstances are different for each school.

Further, the “acceptance rate” you find for a school is an average of the rates for all students. Admissions departments might accept students more or less frequently for specific instruments, musical genres, and particular majors.
Here is one common reason the admission rate for a particular instrument or major might differ from a school’s overall standard. It can help fill out ensembles. For example, if a school is lacking in trombonist, it might accept more players of that instrument, and thus a higher accept rate for trombonists.
Still, knowing the general acceptance rate at a college of choice serves as a great first step in determining the right school for you. That’s why we at Inside Music Schools put together this multi-tiered list of the acceptance rates of many top schools around the country.
I’ve divided this list into two categories. You’ll find conservatories and music colleges under one and universities with truly stellar music departments under the other.
Is there a particular school on the list that interests you? Perhaps you’d like to know whether your chosen instrument tends to have a different acceptance rate. Let’s get on the phone and talk about your music school goals! Call us at 617-823-5442 or contact us today.
ACCEPTANCE RATES OF TRADITIONAL CONSERVATORIES AND MUSIC COLLEGES
- Curtis Institute of Music – 3%
- Philadelphia, Pennsylvania
- The Juilliard School – 5%
- New York, New York
- Colburn Conservatory of Music – 7%
- Los Angeles, California
- Oberlin College and Conservatory – 25%
- Oberlin, Ohio
- University of Cincinnati College & Conservatory – 26%
- Cincinnati, Ohio
- Mannes School of Music – 33%
- New York, New York
- New England Conservatory – 33%
- Boston, Massachusetts
- Boston Conservatory – 42%
- Boston, Massachusetts
- Manhattan School of Music – 43%
- New York, New York
- Cleveland Institute of Music – 43%
- Cleveland, Ohio
- San Francisco Conservatory of Music – 44%
- San Francisco, California
- The Peabody Institute at Johns Hopkins University – 52%
- Baltimore, Maryland
- Berklee College of Music – 53%
- Boston, Massachusetts
- Shenandoah Conservatory – 70%
- Winchester, Virginia
ACCEPTANCE RATES OF COLLEGES AND UNIVERSITIES WITH GREAT MUSIC DEPARTMENTS
Music Schools with Under 50% Acceptance Rate
- Northwestern University Bienen School of Music – 10%
- Evanston, Illinois
- University of Rochester Eastman School of Music – 13%
- Rochester, New York
- The Shepherd School of Music at Rice University – 15%
- Houston, Texas
- Bard College Conservatory of Music – 15%
- Annandale-on-Hudson, New York
- Longy School of Music of Bard College – 88%
- Cambridge, Massachusetts
- University of Southern California Thornton School of Music – 20%
- Los Angeles, California
- Vanderbilt University Blair School of Music – 20%
- Nashville, Tennessee
- Indiana University Jacobs School of Music – 25%
- Bloomington, Indiana
- Boston University – 25%
- Boston, Massachusetts
- New World Symphony Orchestral Academy – Low Accept Rate
- Miami, Florida
- University of Michigan – 26%
- Ann Arbor, Michigan
- University of North Carolina School of the Arts – 33%
- Winston-Salem, North Carolina
- University of Texas at Austin Butler School of Music – 35%
- Austin, Texas
- University of Miami Frost School of Music – 40%
- Coral Gables, Florida
- Syracuse University Setnor School of Music – 47%
- Syracuse, New York
Music Schools with Over 50% Acceptance Rate:
- University of Denver Lamont School of Music – 58%
- Denver, Colorado
- Temple University – 59%
- Philadelphia, Pennsylvania
- State University of New York at Potsdam Crane School of Music – 60%
- Potsdam, New York
- Lawrence University – 62%
- Appleton, Wisconsin
- DePauw University – 67%
- Greencastle, Indiana
- Ithaca University – 69%
- Ithaca, New York
- The Hartt School at the University of Hartford – 75%
- West Hartford, Connecticut
- VanderCook College of Music (Music Education only) – 99%
- Chicago, Illinois
by David Lee Fish
How to Reduce Anxiety for Any Music Performance
Performance anxiety – or “stage fright” as it is more commonly known – can strike even the most accomplished musician.
It’s also something that impacts people from all walks of life. Public speaking engagements, just like music performances, can cause stage fright or performance anxiety.
Stage fright brings with it a range of symptoms that can be more than distressing and actually undermine your performance and even affect your wellbeing. Some even consider it like other anxiety disorders doctors will diagnose.
Your fear keeps you from performing at your best and can make walking on stage a big ordeal. It can even rob you of a standing ovation and be the deciding factor in how well you do during an important audition.
It’s crucial that you learn the tactics that will work best when overcoming performance anxiety. Fortunately, there is a surprisingly simple, proven approach for doing so.
Misunderstanding Performance Anxiety
Let’s begin with some good news.
There is absolutely nothing wrong with you if you become nervous when performing in front of others. The symptoms you experience – an increase in heart rate, a dry mouth, muscle tension, and more – are just a stress response created by your autonomic nervous system reacting to a perceived threat.
Your autonomic nervous system orders a rush of adrenaline that prepares your body for fight or flight. This is an essential response to a physical threat, but is counterproductive for performing artists who have to carry on with trembling hands and a quivering voice.
A perceived threat stands at the heart of performance anxiety. Sometimes it can be subtle. Other times the danger represented by a performance is clear and quite understandable, like before an audition for entrance into an important conservatory or school of music.
The stakes at such a moment are high, with the audition likely representing your only chance for entrance into that institution. Your hopes, ambitions, and all of your hard work rest on this single performance.
How to Calm Your Nerves Before a Performance
Whether stage fright is natural or understandable, you cannot afford to let it undermine you. If you’re like most of us, you’ve tried tackling your anxiety on your own in various ways.
Maybe you’ve tried to convince yourself that getting nervous doesn’t help. Maybe you’ve tried to follow the advice of some self-appointed expert. Maybe you’ve tried taking beta blockers. Maybe you’ve even tried imagining the audience in its underwear.
Whatever you’ve tried, it probably hasn’t helped much. You still get nervous, and there’s a reason – becoming anxious when you perform is as natural as becoming angry or sad.
In the same way you can never completely banish anger and sadness from your life, you cannot completely get rid of stage fright. In therapy, they refer to this as a dead man’s goal because it’s something only a dead man can achieve – don’t waste your time trying to pursue it.
While you may not be able to banish your stage fright, you can find your way beyond it. How?
Accept rather than fight it. As crazy as that may sound, acceptance represents the surefire way to escape the clutches of your fear. You can learn to do so through a process known as mindfulness.
Here’s the great part – mindfulness is not only effective but also quite easy to employ. Plus, you can start to enjoy its benefits almost immediately.
What exactly is mindfulness? It’s the process of concentrating your attention on what you’re doing while accepting any extraneous thoughts or feelings that get in your way.
This simple but powerful formula comes from ancient traditions like Zen Buddhism and tantric yoga, and is quickly gaining scientific validity in our own century. It has inspired a range of organizations including Fortune 500 companies – and even the United States military – to adopt mindfulness in a big way.
Employing Mindfulness
Imagine you’re throwing a party for your friends. Everyone is having a good time until your smelly, foul-mouthed neighbor decides to crash the event. Try as you may, you just can’t keep him out.
Worse, as you try to confront him you spend your concentration on him instead of enjoying your party. The answer to this dilemma is to let your neighbor in. When you stop fighting him, you’ll likely find out that he’s maybe not so bad, and you can go back to enjoying your party.
Imagine stage fright as the unwanted party guest in this story.
If your autonomic nervous system perceives some sort of threat in a performance, you are naturally going to become nervous. When you do, don’t try to resist your anxious thoughts or feelings – simply return your concentration to the performance each time it strays. It may be necessary to do so repeatedly when your performance anxiety is severe.
Achieving mindfulness is more than just thinking about it. Just like with meditation and yoga, employing tested breathing techniques are proven to calm your nerves almost without fail.
You breathe in through your nose, and collect the air in your stomach. Then, slowly let the air out of your mouth.
Before trying this mindful approach, some people can’t believe the simplicity of its recipe for finding your way beyond stage fright. “That’s all there is to it?” some people ask.
The answer is yes, and that’s the best part. You can try employing mindfulness even in your practice room or space – just imagine the audience is there, let yourself get nervous, then practice the tactics I’ve outlined above.
It’s like the old adage about the question of which is the best camera – it’s the one you have with you. The best method to beat performance anxiety is the one that is easiest to call upon when you need it the most.
Release
To be clear, mindful acceptance will not make your anxiety magically disappear.
However, you will experience release from it as its grip on you loosens and your nervousness fades into the background. The increase in concentration you experience also serves as a gateway to the state of flow closely associated with peak performance in music and many other endeavors.
Try this then the next time you find yourself getting nervous on stage. Just accept your anxious thoughts and feelings and return your concentration to your performance, repeatedly if necessary. As you do, you will discover the way beyond your performance anxiety to better achieve the artistic results you work so hard to achieve.
by Steven Lipman
Giving Your Best in a College Admissions Interview
Top musicians know thoughtful preparation is the best way to succeed on their next big performance.
The same holds true for students planning for college admissions interviews. You can think of this interview as perhaps one of your most important performances, so treat it like a professional – prepare to your fullest extent to make sure you knock it out of the park.
During my decades as a director and dean of admissions at a leading music institution, I found that 15- or 20-minute interviews were not always optimal settings for judging an applicant’s viability for success in college. That means the odds are stacked against you.
Applicants are sometimes nervous, jet-lagged, or perhaps didn’t sleep well the night before the interview. Additionally, most high school students have had little experience interviewing.
This stressful environment is not ideal, but it’s often all the admissions interviewer and the applicant have to determine if they are a good fit for each other.
The interviewer is trying to discern whether the candidate will enhance the student body, and is likely to persevere and graduate. Another factor that many applicants don’t think about is whether they are likable.
You can achieve “likability” by being confident, thoughtful, and – perhaps above all – prepared. So, continue reading for my thoughts on how to best present yourself in an admissions interview.
Keep Your Eyes Peeled, and Your Head High
Arriving a few minutes early will indicate to an interviewer that you take this meeting seriously and are respectful of their busy schedule.
Use the time you’ve gained by arriving early to observe your surroundings – do students look stressed out as they go to class? Are there people creating music around you? Do you feel you would be comfortable integrating into the overall fabric of the student body?
Most times there is a receptionist to lead you in to your interview when the admissions person is ready. If there is no receptionist to escort you and the interviewer’s office door is closed, knock right at your appointed time.
Enter the room confidently with a smile and your head held high. Offer a warm greeting such as, “Thank you for offering me this time today.”
These first steps are crucial because – as we all know – first impressions are everything. A great entrance sets the course for a productive and insightful interview.
As you speak, be aware of the interviewer’s body language as well as your own. Take your cue from the interviewer whether to offer a handshake. Keep your focus, and don’t fidget with your résumé, phone, or anything else that could become a distraction during the interview.
Make eye contact and be sure you express conviction in your responses. Your answers should be concise but detailed, and include specifics. Be as articulate as you can, minimizing extraneous words such as “um” or “ah” – speak naturally, clearly, and confidently.
Know Your Audience
Consider the entire school as your audience. Since you want to attend this institution, you should be familiar with some of its unique qualities or programs.
Referring to these particular characteristics at appropriate times in the conversation will show that you are serious about the school. Offer honest thoughts on what you feel are your unique and interesting qualities and abilities while sounding humble. Avoid clichés and generic responses at all costs!
Additionally, observe the facial expressions of the interviewer to assess whether your answers are resonating with your audience. If you find the admissions person is unenthused with your responses, don’t worry – speak with more energy, or begin to ask questions. Continual engagement is absolutely crucial.
Give and Gather Information
Interviewers will have a list of questions for you. Most importantly, be ready for questions about your long-term career goals.
Be able to express why you are interested in enrolling at their school. Mention particular aspects of the curriculum, specific faculty members you wish to study under, or the types of people that make up their student body.
You may also be queried on how you feel you could contribute to the student experience there. This is a chance to share thoughts on any cross-cultural experiences you’ve had and your potential to be a positive team player or leader on campus.
In the course of the conversation, take the opportunity to share thoughts about your creativity and your willingness to step out of your comfort zone. You might be asked about the process you undertook in selecting the repertoire for your audition or the contents of your portfolio.
Engaging dialog is crucial to a successful interview. Come prepared with at least two insightful and relevant questions to ask your interviewer. If a given school has great study-abroad or internship programs, or a cross-registration policy with other schools, ask questions that make it apparent that you have done your homework.
Asking questions is a great way to get more information about the school that can’t be found on the website, and it shows a genuine interest in attending. Many interviewers look upon genuine curiosity positively – it shows initiative, passion, and a true interest in the programs their particular institution offers.
Also, interviewers are always willing to share thoughts about their school’s strong points. Expect this ahead of time, and think of these strengths in terms of your desires and future career goals.
Music school interviews are a perfect opportunity to exchange ideas and information, and in the end you want to make sure the school is a good fit for you. Engaging the interviewers in conversation – through asking questions and listening intently to what they have to say – will only make your candidacy a more serious consideration for the interviewers.
Beginnings and Endings
In a musical performance, many people will remember how it began and how it ended. You’ve put your best foot forward to start your interview, so be ready to end on a positive note.
Giving a sincere thank you to the interviewer for his or her time and attention will leave them with a favorable final impression.
And don’t forget to breathe – this will keep your nerves in check while you undertake one of the most important performances of your life.
Further – perhaps above all – these interviews are meant to show who you are to the admissions person. That means one of the most important things you can do is to be you!
Best of luck!
If you’re seriously considering applying to music school, you don’t have to be alone. Along with expert coaching and benefits such as my “Simulated Admissions Interview,” my guidance can give you a leg up – placing you a head above the rest. Contact me today to find out more!