by Anthony Schultz
Professional recording studios are purpose-built rooms with an abundance of microphones and heavy construction for isolation. These rooms are designed for optimal acoustic properties within the control room and recording space.
Although it is not usually physically or financially possible to build the “ideal” recording studio in an apartment or home, there are ways to make a good sounding recording in any environment. Before you start, it’s good to know about the fundamentals of acoustics and basic microphone techniques. In learning this, these tools will optimize the sound of your home recordings and/or rehearsal/practice space.
Overview of Acoustical Properties within a Room
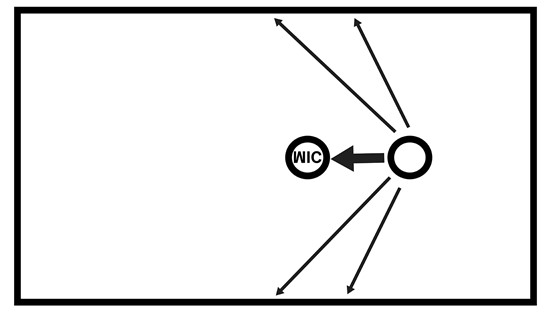
Reflection is when sound bounces off a surface. Collectively referred to as “ambience“, these short reflections define the spatial characteristics of a room. They do have a major impact on the overall sound of the sound being captured with microphones. Spaces with a lot of hard flat surfaces are generally not ideal for recording. Since the reflections tend to sound harsh, they tend to diminish the clarity of the musical performance.
Absorption is when sound is kept from bouncing off a surface due to the material makeup of the surfaces. Bedrooms and Living rooms tend to have less reflective properties since they have an increased number of softer surfaces such as carpets, drapes, large couches and bedding. These materials make a big difference with absorption by altering the reflective properties of a room, drastically decreasing the number of reflections that occur and allows microphones to pick up more direct sound from the instrument. Walk-in closets usually make good vocal booths since the clothing absorbs the sound very well.
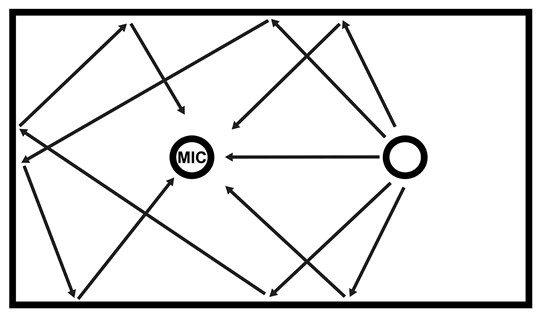
Diffusion is an attempt to scatter the frequencies evenly and avoid a buildup of frequency-specific reflections in a space related to the size of the room. The many decorative surfaces in large spaces such as concert halls and churches serve to “diffuse” the reflections for a more even disbursement throughout the room. A large bookcase can work very well as a diffuser to randomly alter the angles of the reflections in the room. Diffusors are typically used in combination with absorptive materials to fine-tune the sound characteristics of a room.
Diffraction is when sound bends around an object. Baffles, large free-standing absorptive panels, are used to separate instruments being recorded in the same room. They also are placed around a recording area to cutdown on reflections being picked up by the microphones. Baffles are best for blocking higher frequencies. Since the wavelength of low frequencies is larger than the baffle and will bend around anything smaller than its’ wavelength.
Microphone Types
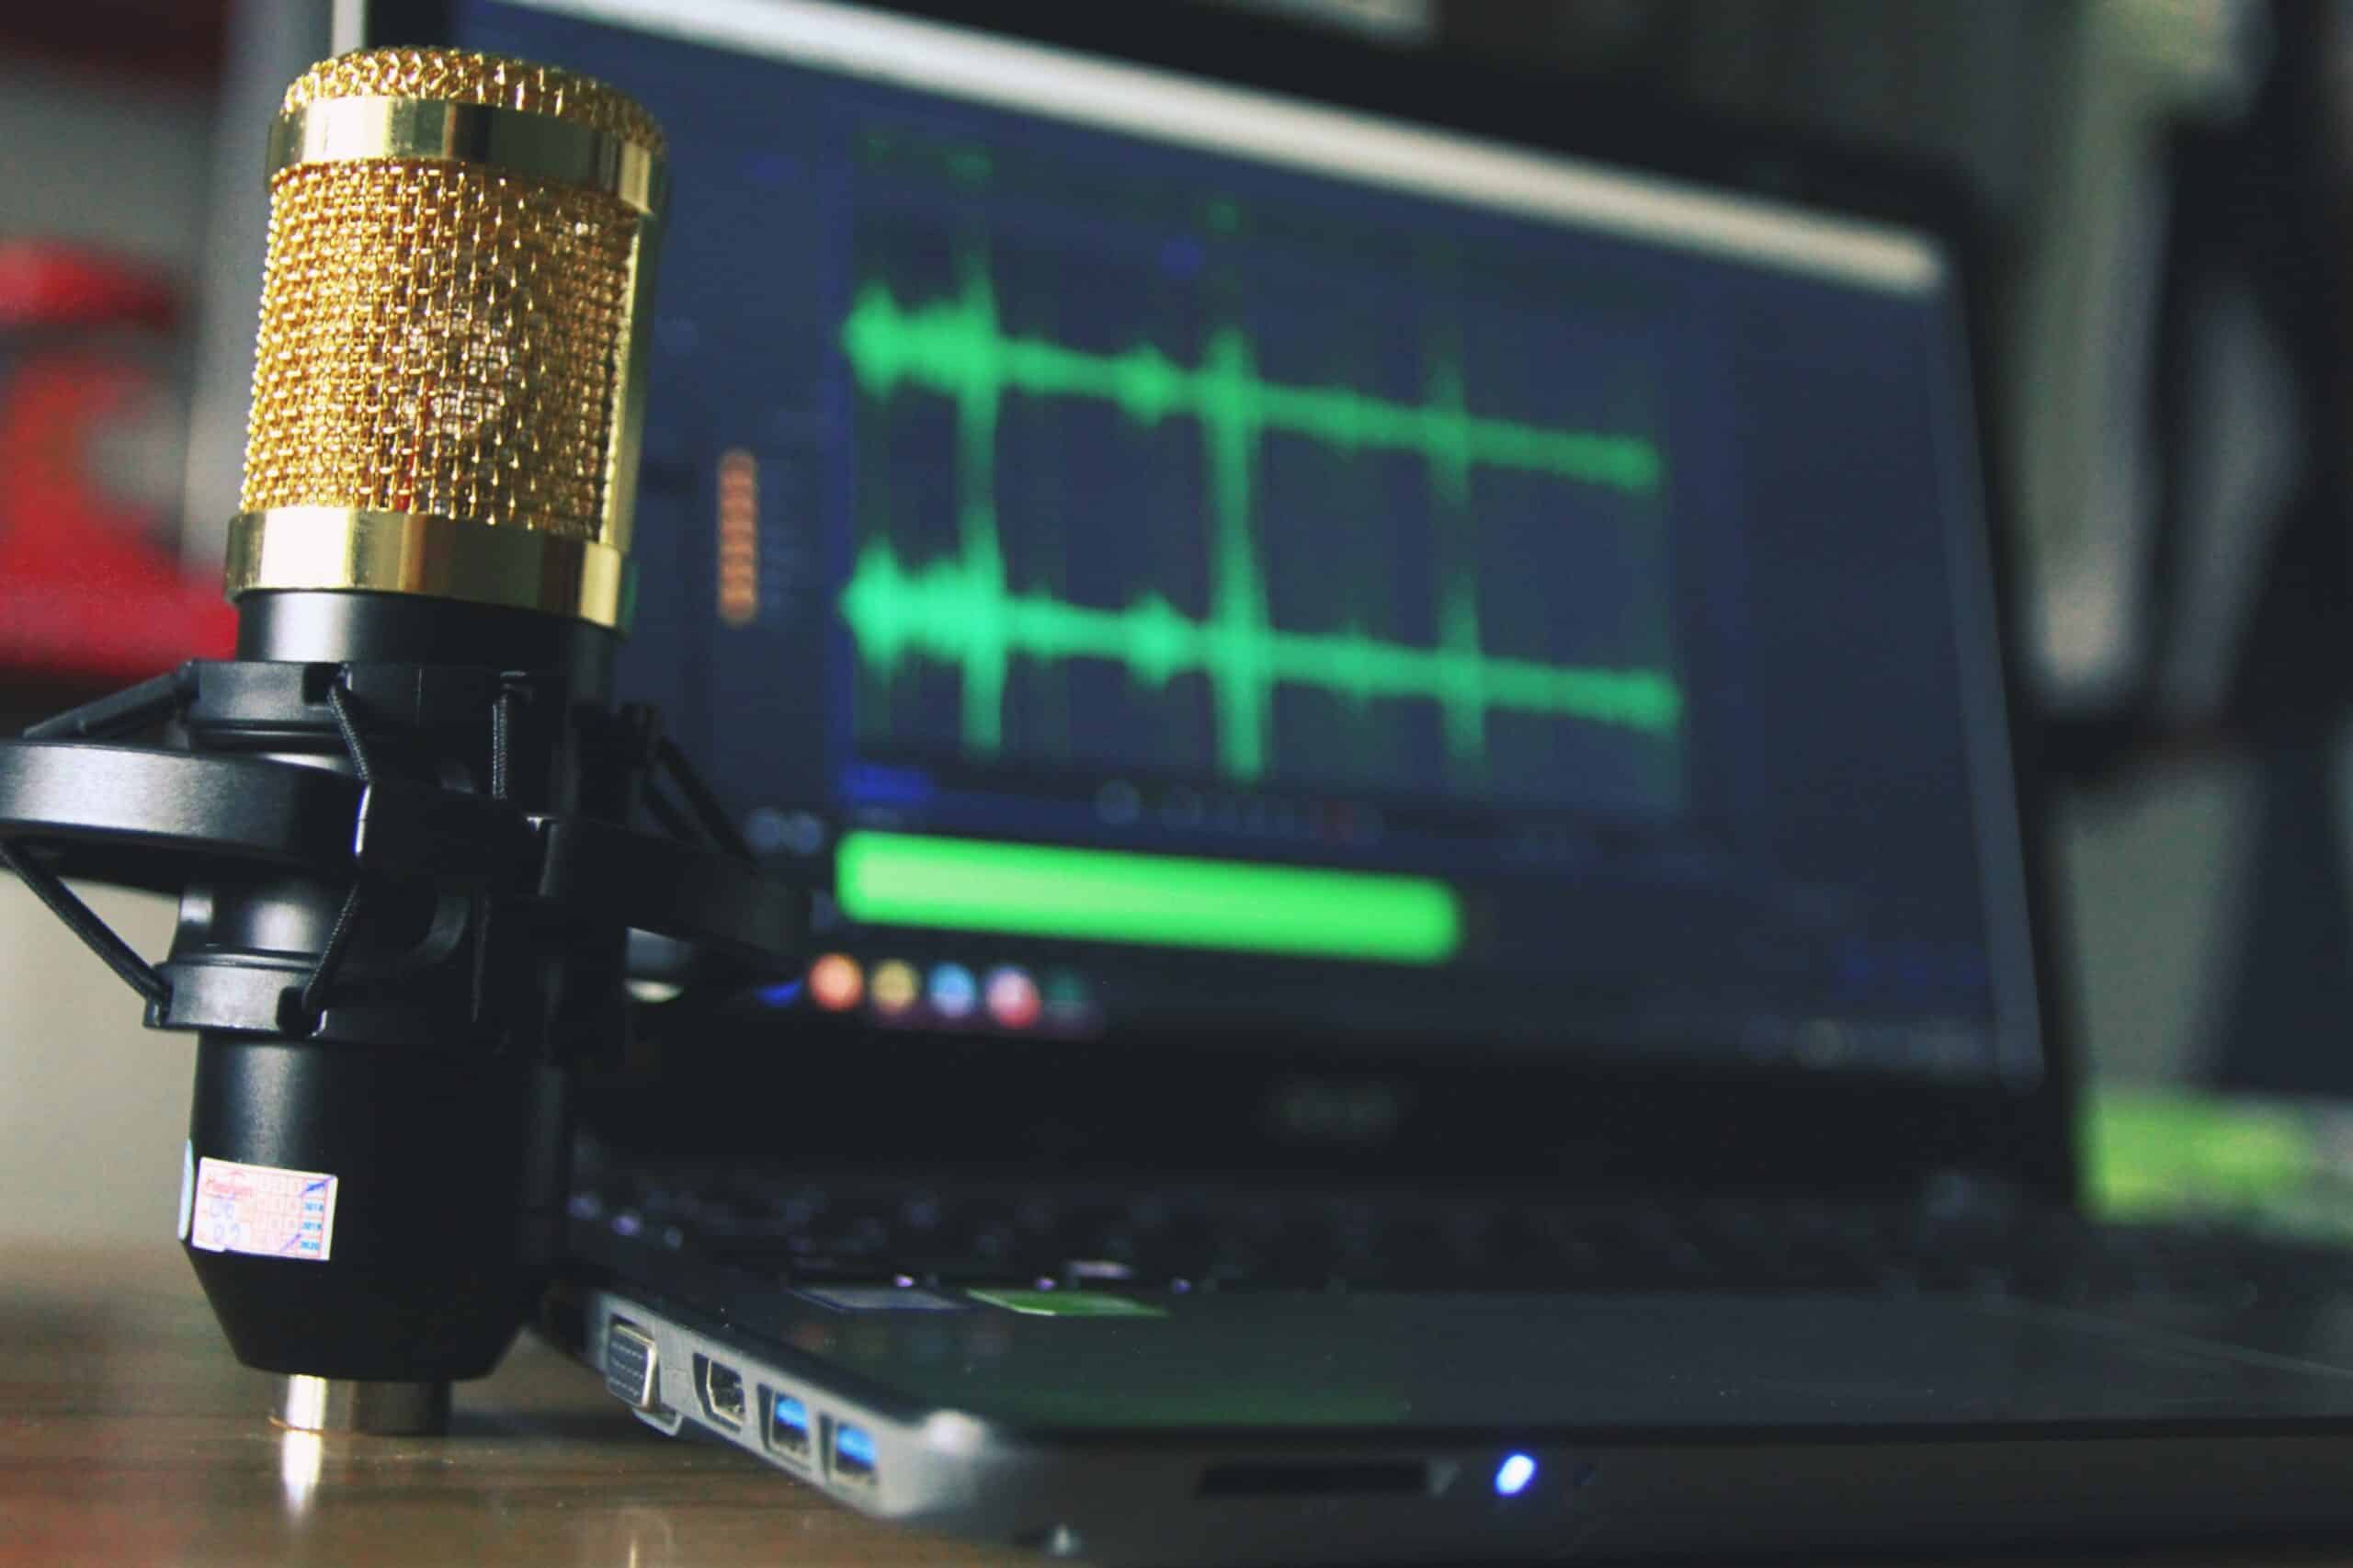
Microphones are transducers that converts acoustic energy to electrical energy. Speakers are also transducers, but in reverse; they convert electrical energy into acoustic energy.
Microphones are categorized by their “transduction principle”, the method used to convert the energy. There are two basic categories of transduction; “Dynamic” and “Condenser”.
Dynamic mics use a magnet to convert the energy. When sound waves hit the diaphragm of the mic, it moves within a magnetic field to recreate the plusses and minuses of the waveshape electrically.
Condenser mics have a “charged” backplate that creates the plusses and minuses from the movement of the diaphragm in front of it. The output level of condenser mics is much lower than dynamic mics and requires a preamp circuit built into the mic to increase the output level of the mic. This preamp requires an additional low voltage power supply of 48v called “phantom power”, which is supplied to the mic through the mic cable from the audio interface or mixer.
Dynamic mics are not as sensitive to room sound and only pickup sound closer to the mic. This is good for voice-overs for narration and podcasting. Dynamic mics are also good for louder sound sources such as snare/kick drums or guitar amps. Condenser mics are usually better for acoustic instruments and will also capture more of the sound of the room.
Polar Patterns
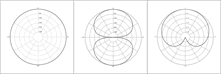
Microphones have a “pickup pattern” that determines in what direction the microphone will be “listening”. The most common polar pattern is Unidirectional, known as the Cardioid pattern, named for its’ somewhat heart-shape resemblance. This pattern has the most sensitivity in front of the mic. It also has the least sensitivity on the backside of the mic. This keeps the focus of the mic on a particular sound source.
The Omnidirectional pattern is sensitive from all directions. It picks up room sound or when multiple vocalists or musicians are gathered around one microphone.
The Bi-directional or Figure 8 pattern is sensitive from two sides. It has a plus side and a negative side that pick up equally on either side. However, when a sound source enters both sides of the mic at the same time, it gets cancelled out (for example; 1 plus negative 1 equals zero). Although mics that include the figure 8 pattern are a bit more expensive, the noise cancellation benefit of this pattern can outweigh the cost, especially for home recording when more extraneous noise may be present.
Mic Switches
Many condenser mics include switches that can alter how the mic is set for the recording.
- Polar Pattern – changes the pickup pattern of the microphone from cardioid to omni or bi-directional.
- Attenuation – decreases the input level of the audio signal into a mic to prevent distortion from louder sound sources.
- Low Cut – cuts low frequencies at a pre-determined rate per octave below the designated cutoff frequency. This is useful to balance the amount of low-end energy being picked up by the mic.
Mic Placement
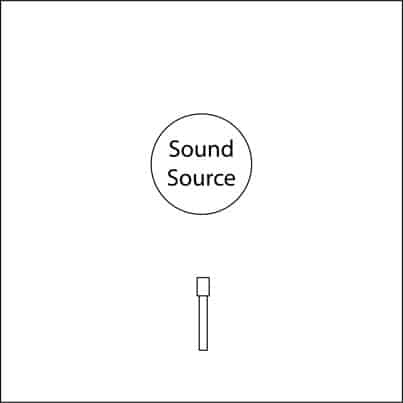
The easiest way to record is to capture sound with a single mic placed in front of or above the instrument being recorded. Although using one mic does not create a stereo image, it does give the instrument a strong presence as a solo instrument and can also be easily positioned within the stereo field of a mix with other instruments.
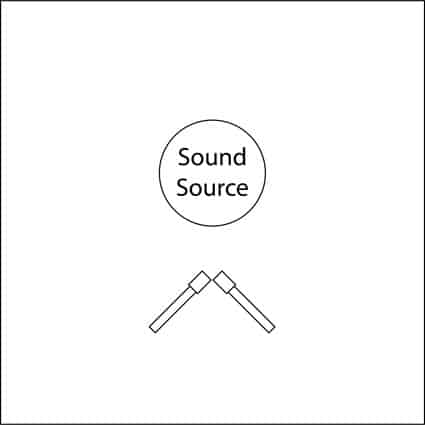
Stereo recording uses two independent channels being recorded simultaneously to capture sound. Each microphone is positioned to pick up the optimal sound of the instrument from two different angles. The most common stereo mic configuration is the X-Y pattern, also known as a coincident pair. It uses two mics placed next to or above each other at a 90º angle facing the left and right sides of the stereo field. The X-Y configuration typically gives a good stereo image and easy to use in any size recording environment.
The Spaced Pair uses two mics that are placed near the outside borders of the stereo field and pointed towards the sound source. The spaced pair typically gives a wider stereo image since the mics are farther apart and tends to capture a bit more room tone.
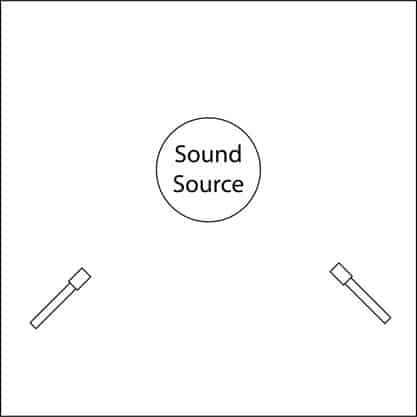
Placing a mic closer to the sound source (A) will minimize the amount of room sound being picked up by the microphone compared to placing it further away (B).
Getting to Know Your Own Spaces
You will want to become familiar with rooms in your own environment. If you are able to listen to the sound of each room and compare the results, you can identify which areas may be more useful for recording and make some decisions about additional modifications that can be made to optimize the sound.
There is a simple experiment you can do to assess the sound of available spaces to be considered for recording using any Digital Audio Workstation application (DAW). If you do not currently own recording software, you can use Audacity, a free multi-platform app can that be downloaded at; https://www.audacityteam.org/
- Choose a dry audio sample that can be played through a speaker in each room you’d like to include in your “experiment”. If you don’t have something readily available, there are plenty to choose from on a number of websites*. Same can be found here; https://samplefocus.com/
*If you want to keep things simple or do not have a speaker available, you can use a “clap” as your sound source and skip the instructions in the next step.
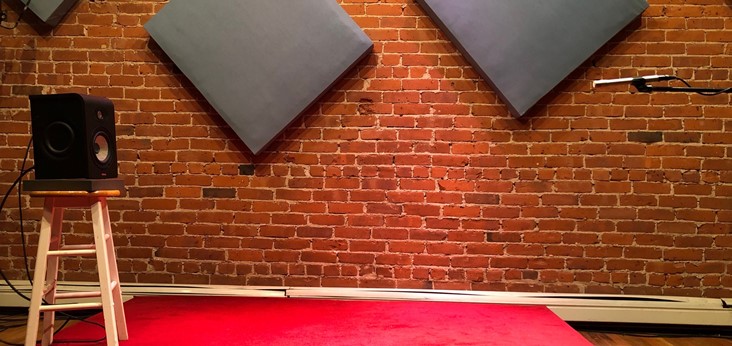
- Set a single speaker on a stool no less than 2′ off the floor, preferably on a piece of foam, to isolate from vibrating the stool. Stacking two milk crates also works well.
- Set a condenser mic 6′-8′ feet away from the sound source (see pic below). Only one mic is needed since we are only trying to compare the ambient aspects of the room. Make sure you have turned on phantom power, the 48v power source for the mic (dynamic microphones will not be sensitive enough to capture the nuances needed for this experiment).
d) Make sure that the recording level and distance of sound source is consistent for all examples during this experiment. Using a measuring tape will ensure that a consistent distance is kept.
Record your reference sound in as many areas as possible. Make sure to keep all tracks muted except for the source track while recording your examples. This will make sure that only the source track is being played through the speaker and to prevent you from creating an audio feedback loop. Make sure to properly label the tracks as you record them.
Making Your Recording (using Audacity)
1) Connect your audio interface to the computer
2) Connect a microphone to each of the XLR input of audio interface
3) Open Audacity
4) Add a mono track by going to: Tracks menu -> Add New -> Mono Track
5) Select your interface in input and playback settings in Audacity Device Toolbar
6) Select project rate in Selection Toolbar
7) In File menu select Save Project, then select Save Project in submenu
8) Create a name for the project
9) Direct to location where the project is to be recorded and hit save in lower right corner
10) Hit RECORD button in Transport Toolbar to begin recording.
You will want to make sure that Overdub has been enabled to be able to record multiple track at the same location. This can be selected in the Transport Options submenu under the Transport Menu).
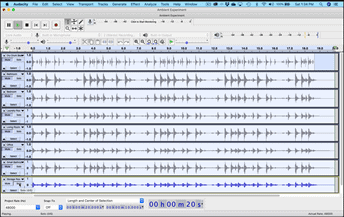
Once you have completed your recording examples, compare the various spaces by soloing each track individually. See the accompanying photo as an example of what this process should look like.
You may be surprised with the results.
Modifications to Your Recording Environment
Now that you have compared some spaces to be considered for recording, you can focus on how you may want to customize the sound of the room being used for your recordings.
Hanging panels on the walls is the quickest way to cut down on the room reflections. If you are unable to mount panels on the walls, you can create a temporary absorber by hanging a moving blanket on a mic stand with the boom arm positioned horizontally. Foam wedges and eggcrate panels are useful for wall surfaces that are too small for larger panels or to mount on the ceiling.
Affordable Microphone Options
There is an endless array of microphones to choose from. Here are a few economical options;
Behringer C-1 Large-diaphragm Condenser Microphone ($45)
Audio-Technica AT2020 Condenser Microphone ($99)
Behringer C-2 Matched Pair Small-Diaphragm Condenser Microphones ($49)
Rode M5 Matched Pair Small-Diaphragm Condenser Microphones ($199)
AKG P420 Large-Diaphragm Condenser Microphone ($209)
Contact Us:
Did you find this blog helpful? Do you picture yourself in a music career? If the answer to that is a “yes”, your next step is simple. Contact insidemusicschools.com and allow our team of industry insiders to guide you toward your goal of being a professional in the music industry. Through expert counseling and real world experience, we will make sure you are prepared for the journey

Founder & President at Inside Music Schools | Insidemusicschools.com
Head of admissions and faculty member at Berklee College of Music for 40 years, Steve Lipman and our team at Inside Music Schools speak music as their primary language. We approach each client contact with open eyes, ears, and minds. As the country’s premier music school consultant, he has advised students from the United States, Canada, the U.K., India, Singapore, Dubai, China, Australia, Turkey, Colombia, Argentina, Brazil, Japan, Israel, Italy, Russia and elsewhere.